How to Repair Ski & Snowboard Bases
Ouch. That fresh gash in your new base hurts like it was your own flesh, right?
We know it’s inevitable, especially if you ride early season, but those core shots in your skis or snowboard are nasty and will inhibit the performance of your board(s). If your gear is in really bad shape, we’d suggest taking it to your local professional tune shop, like the one at evo Seattle, evo Portland, evo Denver, evo Salt Lake, or evo Snoqualmie Pass. If it’s more minor, you might be able to fix it at home. You’ll want to repair deep gouges in your base as soon as possible, both for performance and aesthetic reasons. Here’s how to take care of base damage at home.
Shallow Gouges
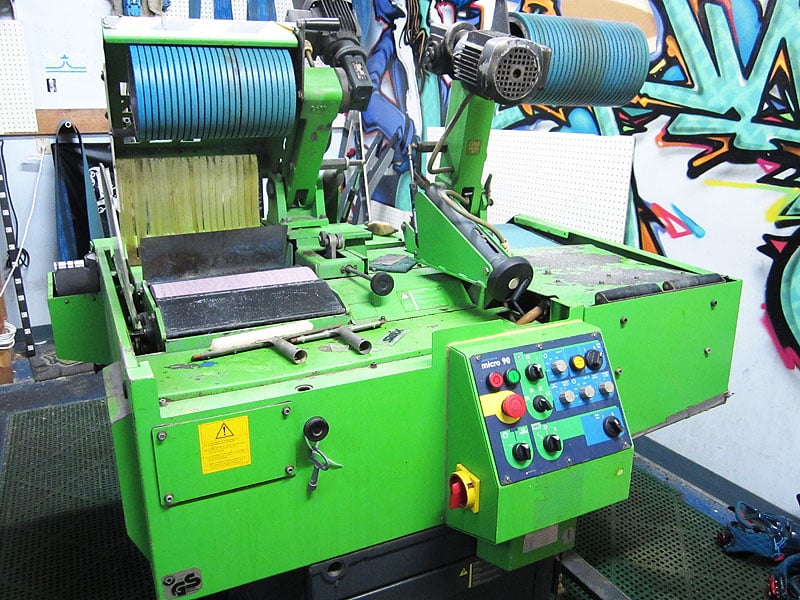
Der Wintersteiger will take care of those shallow gouges.
Shallow, superficial scratches in your base (less than 1/2 mm in depth) are really hard to fill, since the P-Tex won’t stick well. You can minimize the depth of shallow scratches by removing the high spots with a sharp metal scraper or single edge razor blade (SERB). Hot wax over the area and you’ll hardly notice the damage. If you have several shallow scratches or are simply more picky about your gear, a stone grind from a qualified shop can often completely remove shallow base scratches and edge damage.
Medium Depth Gouges
Deeper gouges of 1 mm or more that still haven’t penetrated the ski or board’s laminate layers can be filled using several different methods. Many people burn sticks of P-Tex and fill the damaged area with dripping base material. This works, and fills the scratches evenly, but the high heat of the flame changes the character of the P-Tex and the repair will be softer than the rest of the base. If you use any color other than black, the soot may also be visible in the repaired area. For a cleaner, longer lasting repair, it’s best to use a commercial P-Tex gun (kind of like a hot glue gun that runs at a higher temperature and holds sticks of base material) or a base repair tool (basically a soldering iron with a flat tip). These tools also use specific P-Tex stock – either large round stock (for the gun) or small diameter “spaghetti” stock that will make your job easier.
Make sure the damaged area is free of dirt and debris, and cut away any dangling bits of base before you start the repair. Work the new P-Tex in thoroughly and make sure it’s fully melted and fills the gouge completely. After the area is cool to the touch (around ½ hour), you can trim the excess off with a Surform tool (a handled scraping tool) or razor blade. Finish off with a sharp metal scraper to make the filled area totally level.
Core Shots and Deep Gouges
Severe damage that penetrates the laminate layers of the ski or goes through the bottom layer of fiberglass into the core needs to be addressed before you fill the base. Sealing the core of a ski or board is important to prevent further structural damage, especially from water seeping into a wood core. A good marine-grade waterproof epoxy, or a reinforced epoxy product like JB Weld should be used to patch the core first – you may need to cut and remove even more of the base before you can do this work. Be sure to allow adequate time for the epoxy to cure completely before continuing (read the directions).
After you’ve taken care of the core/laminate layer, you’re ready to repair the P-Tex. For large areas (more than 1 square inch of base) it’s sometimes easiest to cut out a simple geometric shape from around the gouge in your base and match it with a piece you cut from a sheet of P-Tex (available here: http://www.tognar.com/p-tex-base-material-black-or-clear/). Commercial P-Tex templates, usually in an elliptical shape, are available, or you can make one from a piece of dense cardboard – use the template to make sure the piece of P-Tex you remove is the exact same shape as the new piece you insert. This piece is then glued rather than melted into place using epoxy and clamped with flat metal sheets or pieces of wood to distribute the pressure evenly until it cures. Make sure you have the rough side facing down when you apply the patch, and let the epoxy cure completely. A slow curing waterproof epoxy like 24 hour marine grade is usually a better choice than the 5 minute hardware store variety.
The patched area can be prepped and waxed as soon as the clamps are removed; you will probably need to do a bit of grinding and scraping to get the repaired area flush with the rest of the base. This is especially true on skis that have been tuned many times, where the ski base material is thinner than the P-Tex sheet used, and you may wish to bring it to a shop for a stone grind to get the repair totally smooth.
Narrower core shots are probably best repaired in the conventional manner after making sure the core is sealed, using either the base gun or base repair tool and razor blade or metal scraper.
Edge Damage
Base damage that’s serious enough to warrant fixing usually means edge damage as well. Edges that are damaged by impact with rocks are “work hardened,” making them difficult to smooth out using a metal file. It’s best to remove the burrs first with a coarse diamond stone (also called a diamond file), then work on shaping the edge and removing the deep scratches with conventional files. Diamond stones are plastic blocks with surfaces of industrial grade diamonds imbedded in the cutting surface – they’re not cheap, but they’re super effective at removing burrs and are light and small enough to carry in your pocket on the hill, which is really convenient if you happen to damage your edges during the day. Deep scratches in the edge are best removed with an aggressive file like a Panzer file and a file guide after the burrs are gone.
Fixing serious edge damage by hand sometimes takes hours of work; it may be more cost effective to take your skis or board to a shop and let their stone grinder do the job. You’ll also want to make sure the base is flat and edge profile intact after working on them.
Bent or missing sections of edge are pretty serious, but can often be fixed. Bent edges can be repaired using careful pressure with a vise and a bit of heat or simply a hammer and chisel or screwdriver, then injecting epoxy into the voids and cracks and clamping. A missing piece of edge usually means cutting and removing part of the existing edge and replacing it with a screwed-on piece of new edge cut to fit. A skilled repair person can do a barely noticeable job of edge repair that will last for years. If the edge is merely cracked, but still straight and solid under the base, file down any sharp corners to prevent it from catching and check it periodically for structural integrity. You can also ski with a damaged or compromised edge on the outside edge since it normally receives less stress than the inside edge, though you should repair it as soon as possible.
This is evo. We are a ski, snowboard, wake, skate, bike, surf, camp, and clothing online retailer with physical stores in Seattle, Portland, Denver, Salt Lake City, Whistler, Snoqualmie Pass, and Hood River. Our goal is to provide you with great information to make both your purchase and upkeep easy.
evo also likes to travel to remote places across the globe in search of world-class powder turns, epic waves, or legendary mountain biking locations through evoTrip Adventure Travel Trips. Or, if you prefer to travel on your own, check out our ski & snowboard resort travel guides and mountain bike trail guides.
Still have questions? Please call our customer care team at 1.866.386.1590 during Customer Care Hours. They can help you find the right setup to fit your needs.